Reverb can be an important element of a mix – even (or especially) when it isn’t instantly noticeable. In fact, only a little bit of reverb, applied to the right instruments, can already make a difference between a seemingly lifeless and sterile and a natural and pleasant overall sound.
Among the numerous types of reverbs available today, the good ol’ plate reverb has definitely earned its stripes in the mixing studios all over the world during the last decades. Due to its ability to give the source signal a nice, warm color it has quickly become a popular tool (not only) for vocal mixing, pretty much ever since it came up.
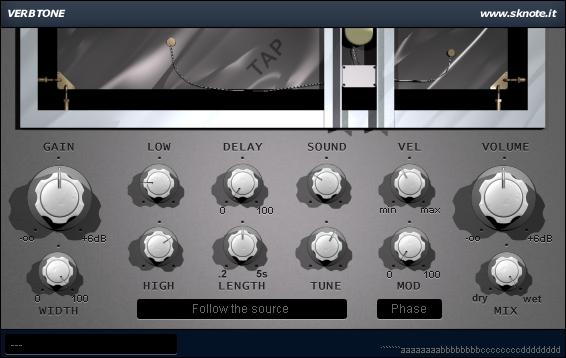
In this tutorial, we will explore the Sknote Verbtone , a plugin that faithfully recreates the feel and tone of a physical plate reverb. We will also have a look at a feature that has recently been added to it during the update to version 1.1.0. Of course, we will use it in a truly traditional way, while mixing the vocals of a rock song.
At first, let’s have a listen to the track:
The overall sound is fine, however the voice doesn’t quite sit in the mix – it literally sounds somewhat ‘dry’ – call for action!
Breathing Space
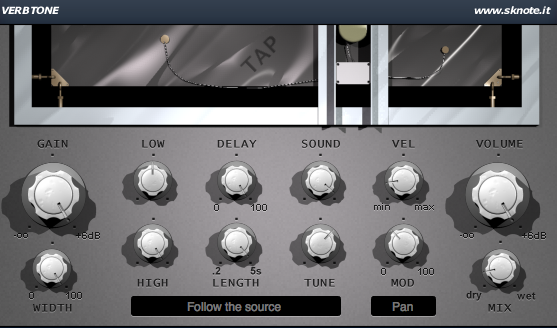
The first thing to notice is that we will utilize Verbtone as an insert effect. This may be a bit uncommon when it comes to reverbs (more often it serves as a send effect), but since the vocal track is the only part we will process for now, it doesn’t make much of a difference. We start by adjusting the LOW and HIGH controls, which act like conventional high pass and low pass filters for the wet signal. For our vocals shouldn’t interfere with the bass, kick drum, etc. we go for a quite steep high pass filter and set LOW at the middle position. On the other hand, the sound should have a nice top end instead of sounding muffling so we turn HIGH all the way up (virtually de-activating the low pass filter).
Next up are (Pre-) DELAY and LENGTH, which we set both to maximum. This is a useful trick when you want a big reverb sound that doesn’t interfere with the actual source signal. SOUND and TUNE need to be adjusted carefully so that the hall fits the tone of the vocals appropriately. So take your time when you adjust these for your own material. In our case, five and one o’clock will be the best settings.
VEL and MOD define the modulation, which is applied to the wet signal. In general, VEL determines the speed, and MOD the depth of the effect. We choose a subtle pan modulation (the actual mode can be chosen from the drop down menu below). After that, we choose the new FOLLOW THE SOURCE mode from the drop down menu in the middle of the interface. This means that the reverb is now coming from the same direction as the source signal.
We’re almost there. As mentioned earlier, we use the plugin as an insert effect – therefore we want to keep the wet signal fairly low, at about nine o’clock. Finally, we crank both, GAIN and VOLUME all the way up. Although this shouldn’t result in a massive raise in volume, but rather bring things up to the original level, make sure that your system volume is LOW ENOUGH before making these adjustments.
The interface of the plugin should now look something like this:
The Result
Back to our sample track. The effect won’t be mind-blowing, but as we implied at the beginning that doesn’t have to be a bad thing at all. With just the right amount of a colored plate reverb the vocals will now sound a lot more organic and not any longer just ‘on top’ of the mix.
You can download the preset for Verbtone here: Verbtone_Rock_Vocals_Insert.FXP

