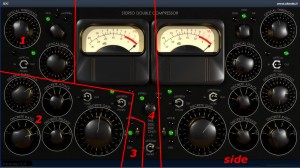
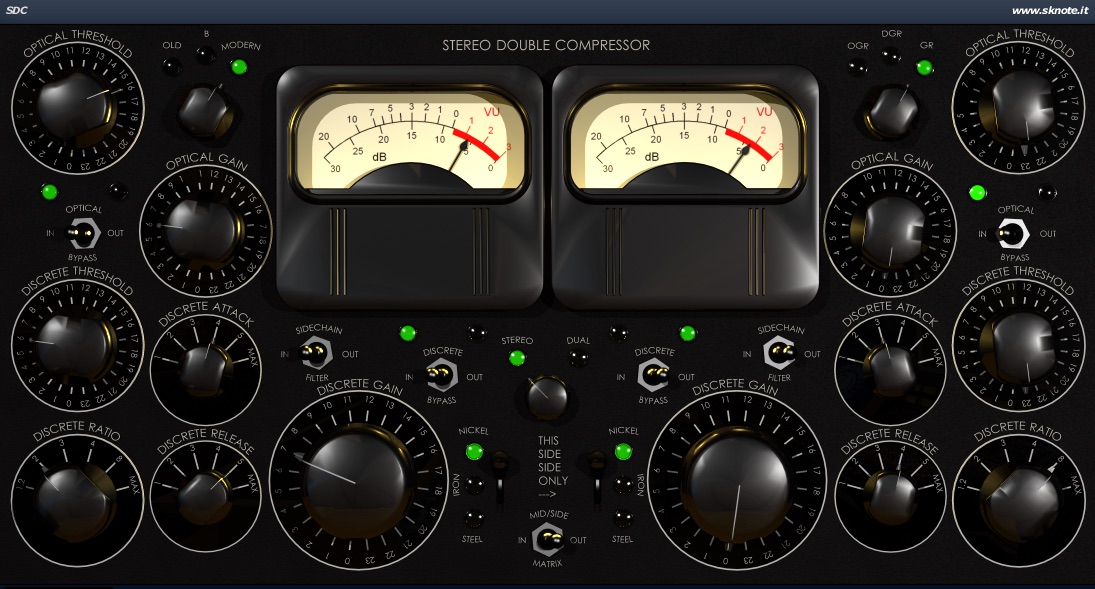
SDC has a huge interface full of controls. The placement of knobs, switches, leds and meters can be confusing at first.
It is extremely clear once you get used to look at it as regions.

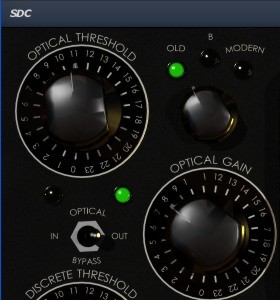
1 – Optical Compressor.
SDC is built around two compressors per channel.
Input signal goes to the first stage, an optical compressor.
Compression (dynamic reduction of the gain, depending on input level) is achieved through a gain control element with external control port.
Optical compressors use an opto-coupler as their gain control element.
A device emits light of intensiti proportional to input signal. A light sensing device attenuates the output proportionally to the intensity of the light they are exposed to.
The higher the signal, the more intense the light, the stronger the attenuation.
SDC uses an electroluminescent panel (ELP, a special foil) as light emitting device and a photo-resistor (a resistor which changes its resistance with the incident light) as its light sensing device.
This is the vintage way of doing it, as opposed to more modern LEDs and opto-couplers.
What’s nice with the old way is that panels and photo-resistors are lazy and their behavior depends on frequency, too. It often means more “musical”.
This optical compressor is the simplest possible one. It has a fixed internal threshold, an input gain control and an output gain control.
To set it, adjust input gain until you get a good amount of compression (see below for meters), compensate for it by the output gain knob, use the bypass switch to compare dry and effected signal.
We used several devices (for an average) and also discrete prototypes to model this stage. While testing optocouplers we found several models quite interesting, so three different models have been included here.
Select the one which sounds better for the use.
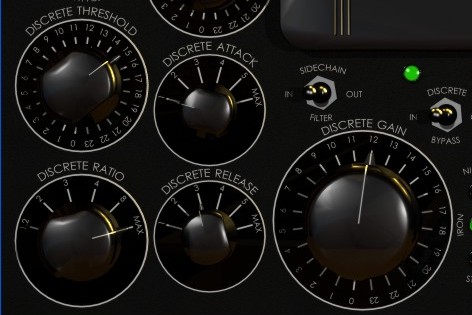
2 – Discrete (VCA) Compressor.
The output from the opto-coupler goes to the Discrete Compressor (also defined as VCA Compressor).
The Discrete Compressor has more parameters, so it is a bit less simple but gives more control on the results.
As opposite to Optical Compressor, Discrete can be extremely fast and controlled. Coupling a first lazy and characterful stage with a fast and controllable one is a great, versatile system.
Internal threshold is exposed as a parameter here. It is needed to de-couple Optical’s output control from Discrete compression. You can use Optical output gain just to compensate for its input gain and Discrete threshold to set Discrete section independently.
Once bypass is set to “In”, set ratio to it max value CW. With this setting the compressor has the stronger action and we can easily hear what’s happening. There’s time to reduce Ratio later.
Set attack (time) to minimum value, Release (time) to minimum value.
Move Threshold control looking at the meter (see below for meters) until you get a good sound. Increase Attack (time) to get more snap if needed. Increase Release (time) to get more control on decay.
Once set, try different values for Ratio.
Always compensate for threshold by output gain control.
Compare dry and processed signal by Bypass switch.
There’s another option available. The Sidechain Filter reduces sensitivity to low frequency range in the sidechain. When engaged, low frequencies are compressed a bit less. Results are often fuller and more mnusical, low frequencies are a bit less controlled and sound better. With extreme settings, the filter may prevent distortion.
NOTE: the sidechain filter is inserted in the Discrete section only and doesn’t affect the Optical section.
3 – Output Transformers.
Transformers are the traditional way of coupling a device to a balanced line. Today we have more options, like active networks, but transformers are often useful for their sound.
A transformer stops static voltage while lets oscillations pass through.
Even the best transformer introduces some kind of distortion in the lowest frequency range. This kind of distortion (which is unique and related to magnetic phenomena) is often useful. This is why SDC includes three different output transformers as “color” options.
Select the one which sounds better for the audio material. Nickel is cleaner, Steel is the dirtiest, Iron is in the middle.
4. Stereo Mode.
SDC works in three different Stereo Modes.
– Stereo. Left and right sections are linked. The same amount of compression is applied to both sides. Prevents the stero image from shifting (moving from the original position in the stereo panorama). Both channels are controlled by left set of controls.
– Dual. Left and right sections are completely independent (like two pairs of compressors in two separate, unrelated cases). Each side is compressed depending on its individual input level. There’s no relationship between left and right compression. May sound richer and wider on sources where stereo image doesn’t need to be controlled. Both channels are controlled by left set of controls.
– Mid/Side. This is the only situation where the mirrored controls on the right part of the interface are active. Left controls Mid compressors, right controls Side compressors.
5. Mid/Side mode and controls.
SDC includes a Mid/Side encoding and decoding matrix.
Left and Right channels are mixed together (in phase) to get the Mid component, mixed together again (with opposite phase for Right) to get the Side component.
Mid is sent through the left chain of compressors, Side is sent through the right set of compressors.
Mid and Side are combined again at the output to get back Left and Right channels, which are sent to the output of SDC.
Mid/Side compression and balancing is a kind of processing which can be extremely useful on some sources (e.g. mixes or groups), to achieve a deep control on the stereo image.
It is not the simplest way of doing things, though, experimentation is the key.
When you engage the Mid/Side mode, setting from the right part of the interface (otherwise inactive) affect the Side component, so we need to balance settings to start setting the device. The best starting point is with the right compressors set to bypass, then engage the first one, balance Side level by gain controls and start from there.
6. Meters.
Meters can be assigned to several combinations of parameters, by the small knob placed on top of the right part of the interface.
OGR. Optical Gain Reduction. Gain reduction for left optical compressor is shown through the left meter, gain reduction for right optical compressor is shown through the right meter.
DGR. Discrete Gain Reduction. The same as above but for the Discrete section only.
GR. Gain Reduction. Gain reduction for left Optical stage is shown through the left meter, gain reduction for left Discrete stage is shown through the right meter. It is not a complete readout (four meters would be needed) but it is effective for an overall view on the behaviour of the four stages.
The reading is always the lowest, linear on a logarithmic scale.
7. NEW in 2019 version: sample aligned DRY Mix feature.
When Mid/Side mode is off, engage and gain controls for the discrete section on channel two (right side of the interface) act as a sample-aligned Dry Mix control. Engage the Discrete section in channel two (right part of the interface), increase “Discrete Gain” control to add Dry signal to processed signal.
A controlled amount o Dry signal, added to processed signal, can be the key to transparent but effective compression, often useful for mastering. Set the compression to get the right style of action, then reduce the final effect by mixing some Dry signal in.
NOTE: the Dry signal is added after all the compression stages, including their Gain stages.


